Make your own wooden raised bed
Raised beds are a practical thing. They offer many advantages in the garden, and are also a design element. Since I like the smell of fresh sawdust in between, I decided to build two new raised beds myself.
In the following I share my experiences with raised beds and how I proceeded in the realization of this small project. Do you also have experiences with raised beds that you would like to share? Leave a comment at the end of the article.
Characteristics of raised beds
Raised beds have many practical features. They are a design element in the garden and they also allow planting in places where this is not possible with a conventional bed. This is also the case in our garden.
Due to their design raised beds have the following advantages:
- The soil warms up faster because the container is exposed
- Pleasant working height
- planting is possible in places where it is not traditionally possible
- Creative element
- Slightly better snail protection due to the height
- Especially suitable for Mediterranean plants (warmth!)
Where there are advantages, there are also disadvantages. Or lets call it things that should be considered:
- Because of the higher heat absorption the soil dries out faster. The raised bed volume should therefore not be too small. Water regularly!
- The heat radiation is also higher due to the exposed sides, as with a potter’s vessel. Depending on the region, protection around the bed in winter is recommended for plants sensitive to cold.
My chosen Design
The idea to build these two raised beds was mainly to make use of the unused area. In addition, this location (see picture below) is very warm and the solar radiation is very high. Ideal for the children of the sun from the mediterranean region like tomatoes, aubergines, peppers but also various herbs like basil.

When choosing the materials, it was clear to me from the very beginning; it has to be wood! Wood is simply an ingenious raw material and conveys a certain warmth. Especially since there is already a lot of stone in our garden, wood offers a good contrast. Here in Switzerland there is also more than enough wood and mostly available from local forestry. In order to maximize the longevity of the beds, I have additionally lined the beds with nubbly foil. This can of course also be omitted.
I have chosen the dimensions as follows:
- length: 120cm
- width: 75cm
- height: 60cm
- This gives a volume of a around 800 litres
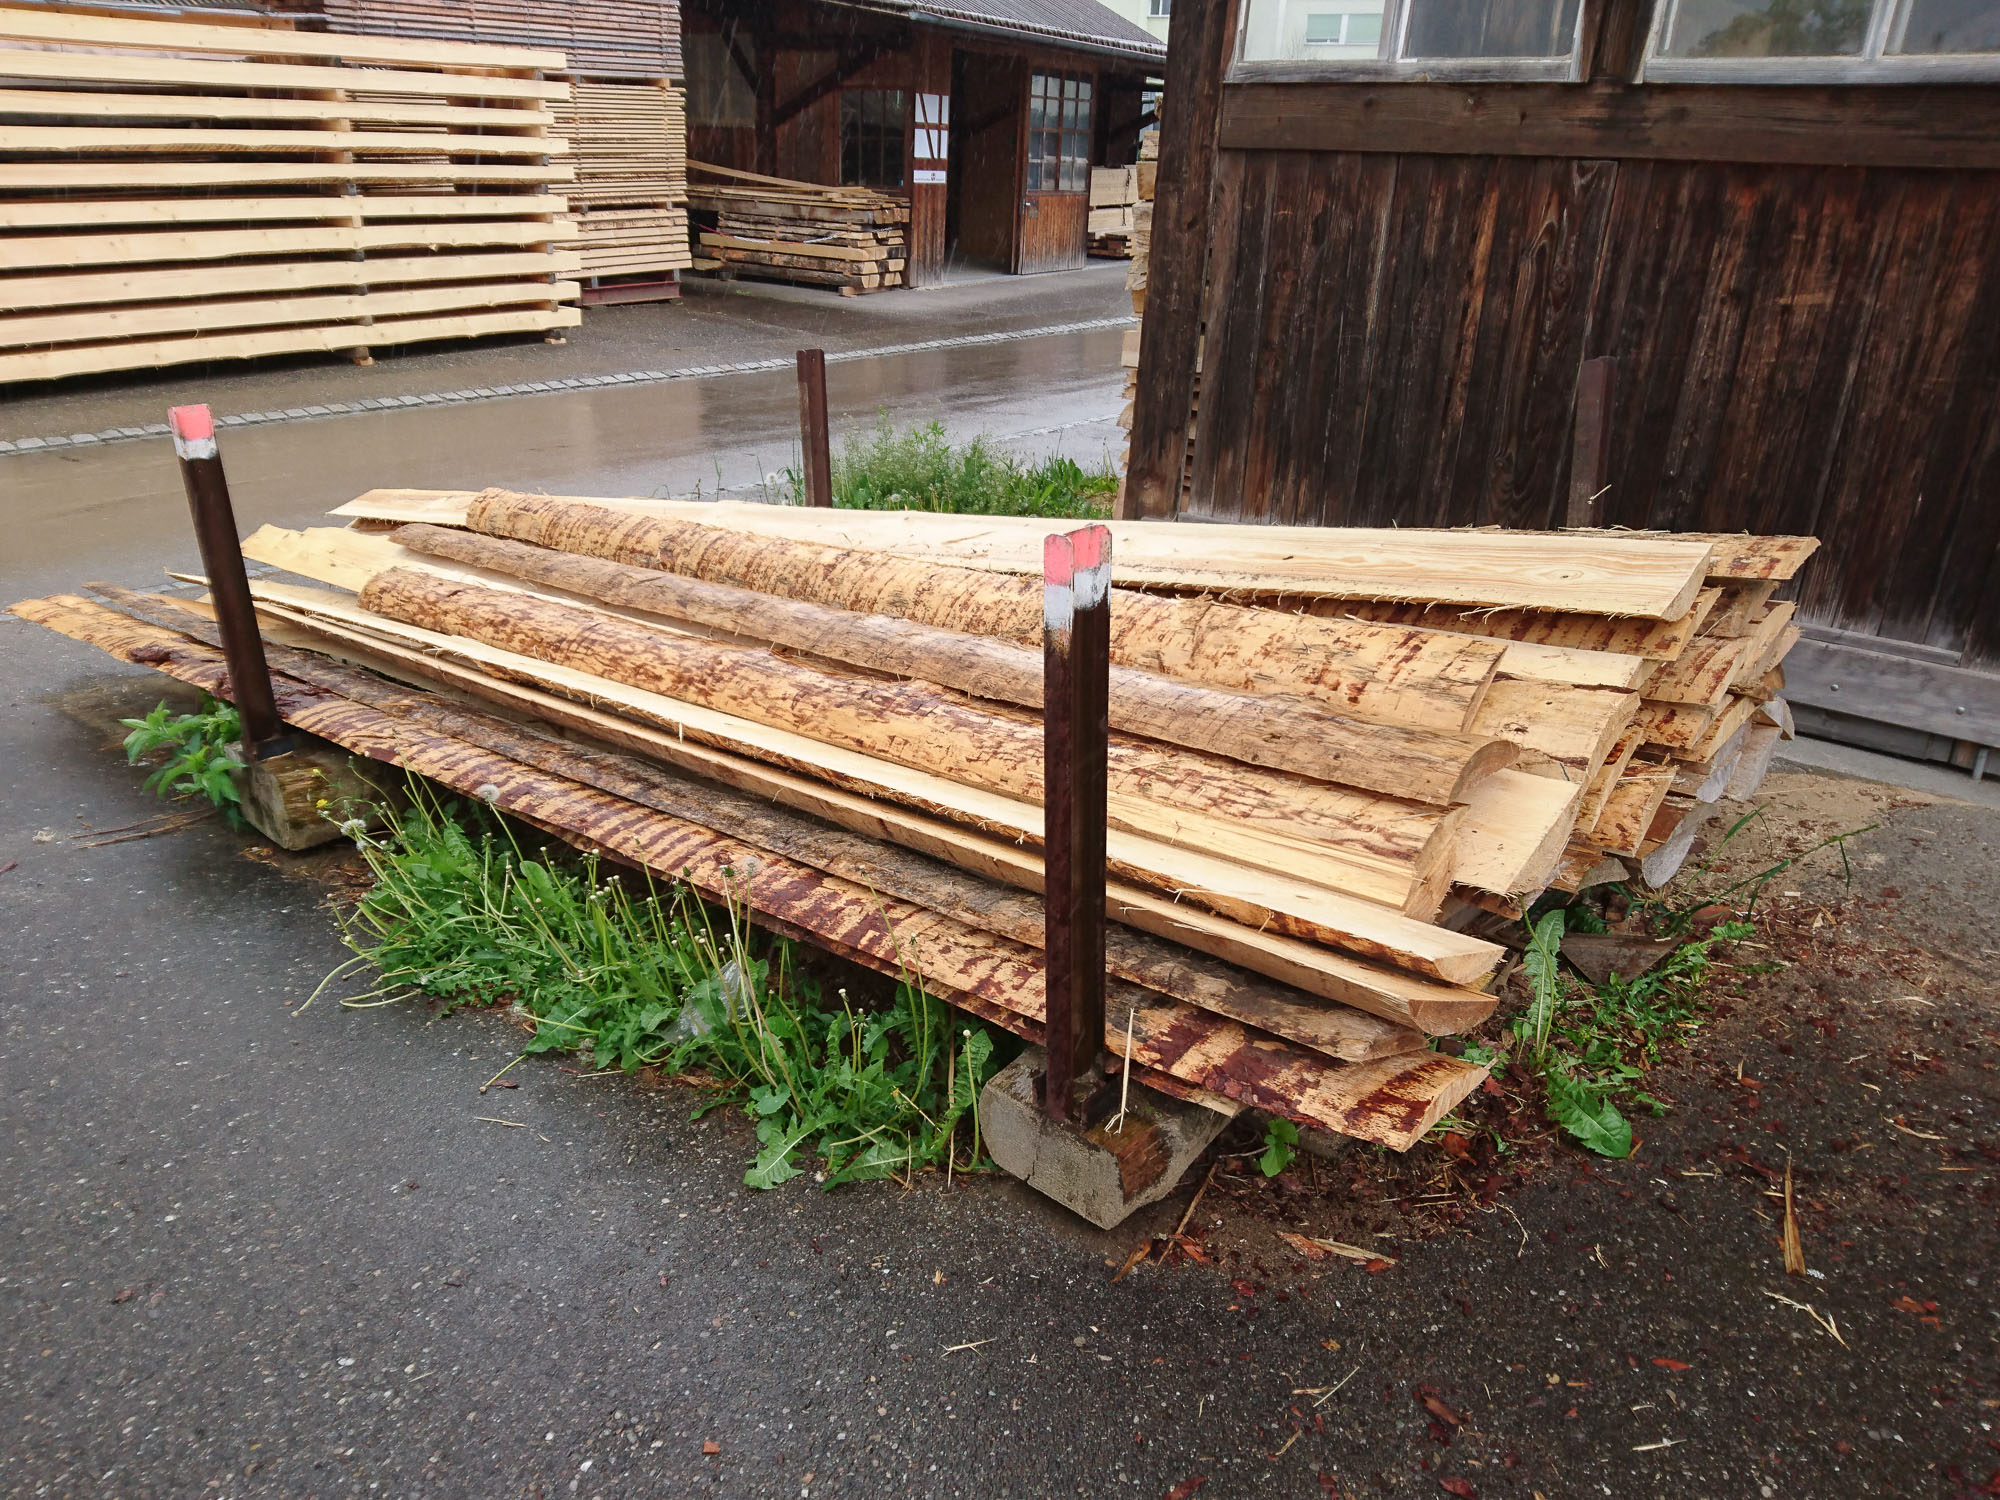
After everything was measured and drawn up, I went to Schlatter Holzbau AG in Oberglatt. The company is located only a few minutes’ drive from my home. As soon as I got there, I saw that there was a large pile of wood rind in front of the workshop. Apart from the fact that they are actually a by-product/waste product, they also have an interesting appearance. I had a short talk with an employee of the company and settled the administrative part. Afterwards I selected suitable boards and loaded them on the roof rack of my car.

It is important to note that the width and thickness of wood rind varies. I have selected pieces that are as even as possible. I have also bought some posts and laths. The burl foil I bought in a hardware store in the area and small material like screws and staples for the staple gun (stapler) I already had at home.
Construction of the raised beds
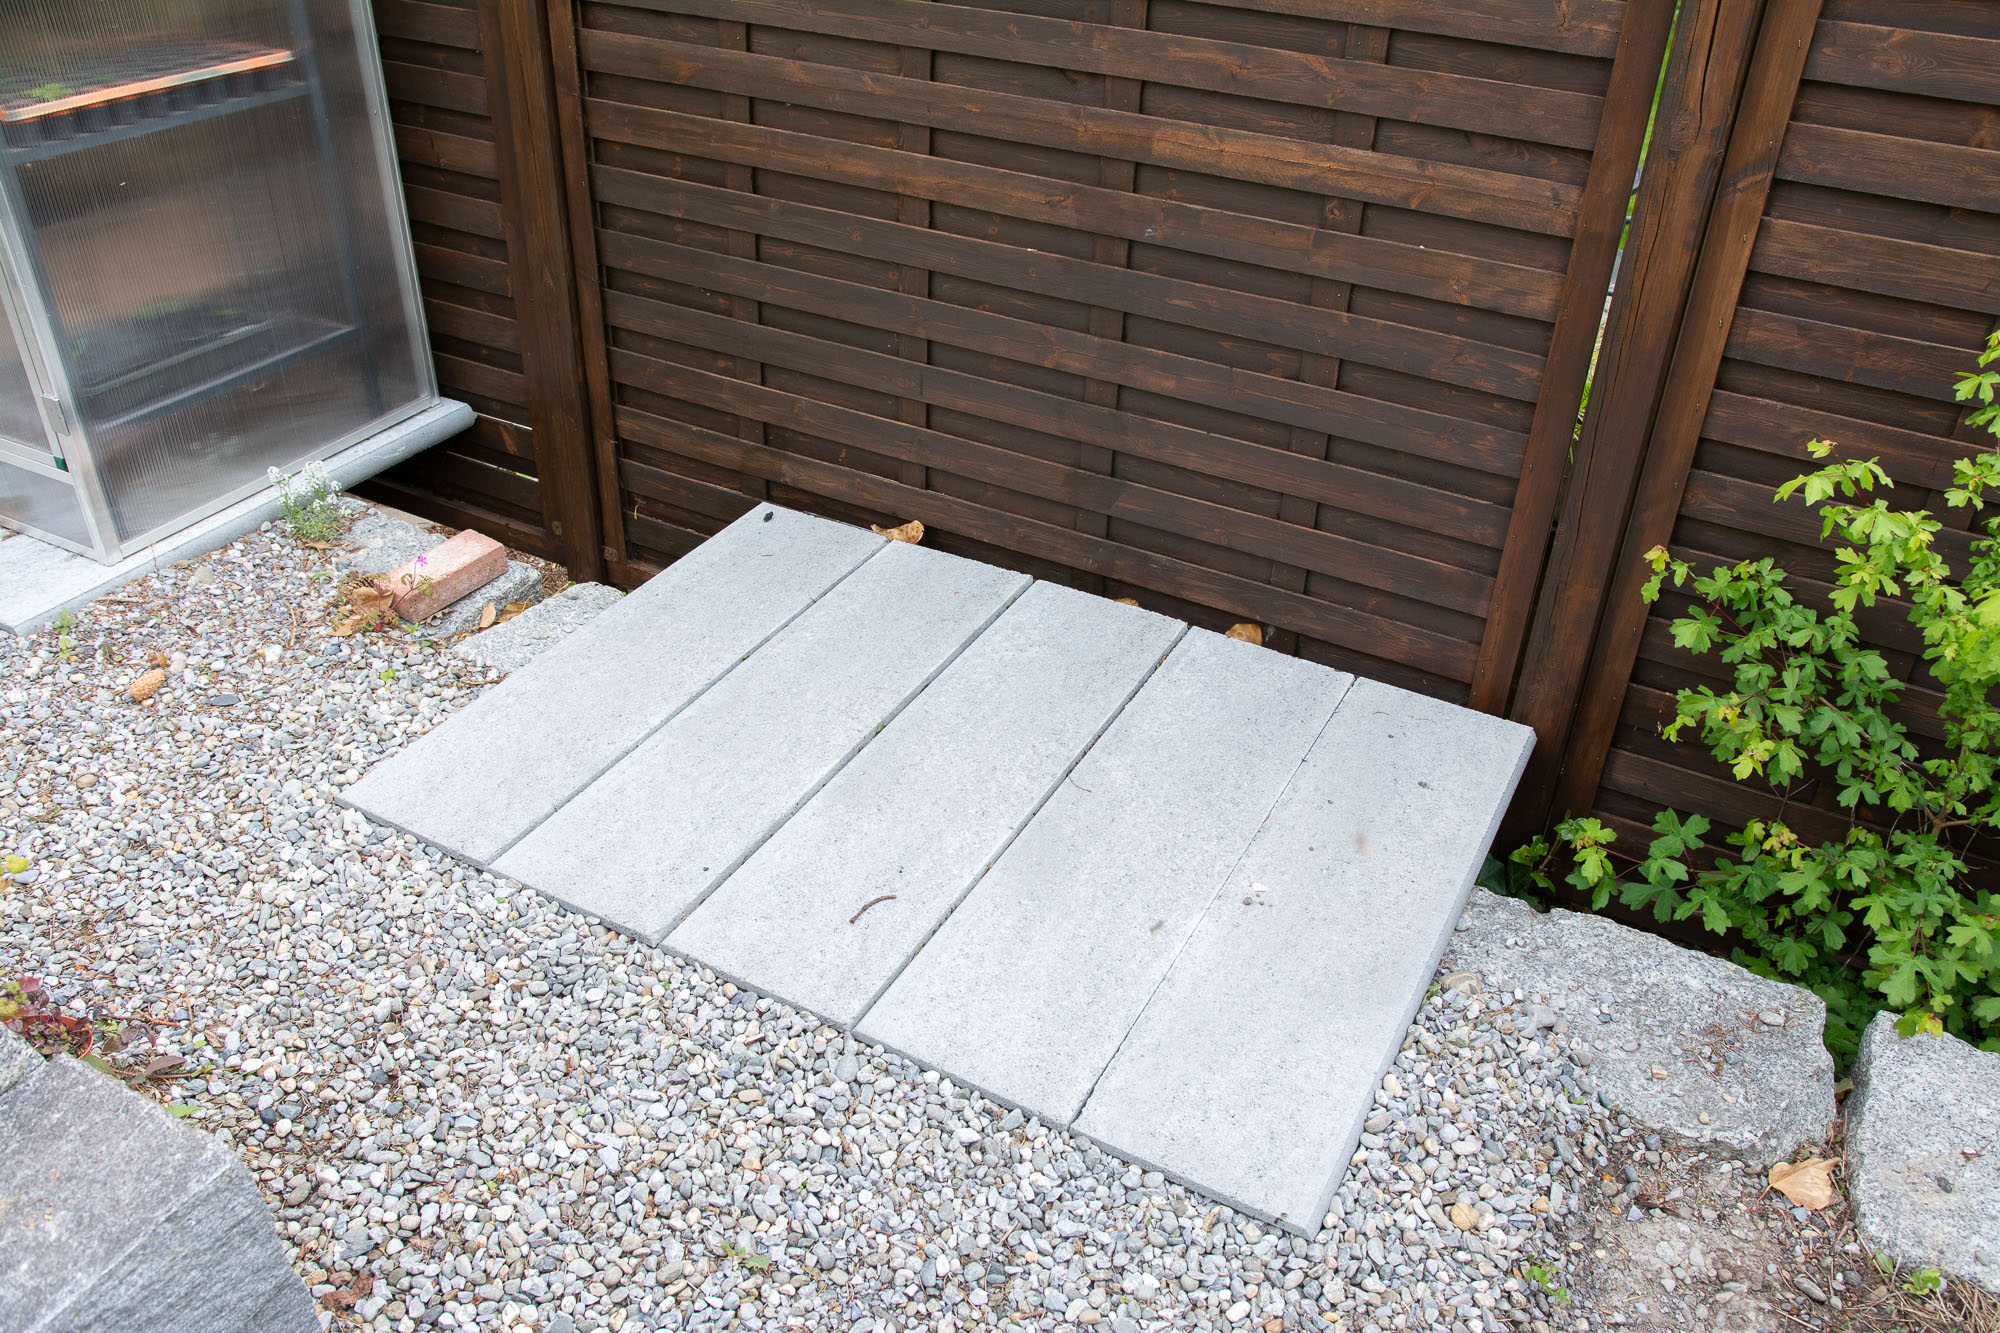
After I had gathered all the material, I first prepared the ground. This should be as horizontal and flat as possible, so that the raised bed will stand well and stable later. In my case, I had to level the ground first and then create a flat surface with curbstones. Since the raised beds are open at the bottom, I would not have been able to fill them at all without them.

As a first step I sawed all boards, posts and laths to the planned dimensions. Wooden rinds are not even boards. So I first had to bring them into a uniform shape. If you do not have a suitable saw, I recommend to have the boards cut to the required dimensions directly from the sawmill/building supplies store. Or to use proper boards instead of wood rinds.

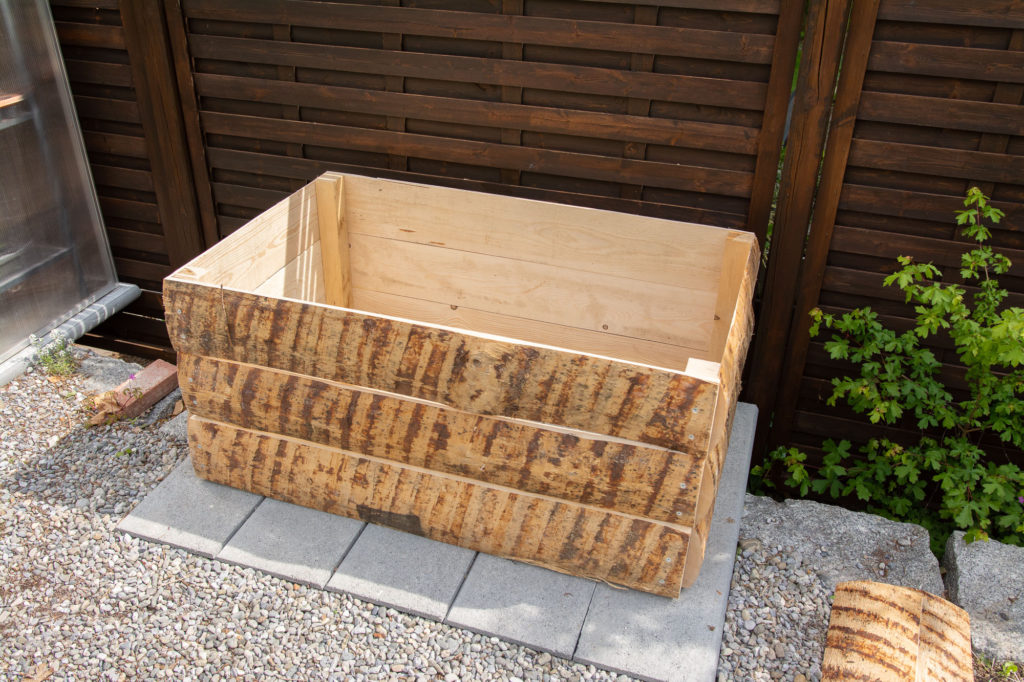
After all parts were cut to the desired dimensions, I first screwed the side walls to the posts. Then I attached the back. For this, I used the least beautiful boards.

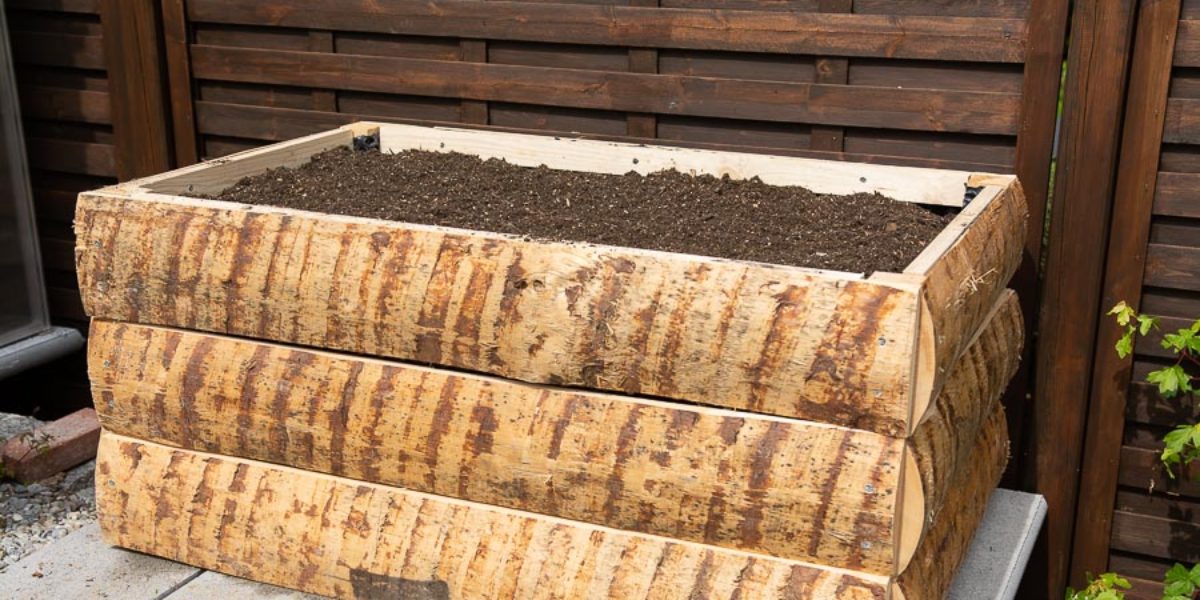
Then I turned it again and screwed the boards for the front to the posts. Ready is the raised bed! Only the optional burl foil is missing.
The burl foil must first be cut to the correct size. I have measured it so that there is an overlap of about 10 cm. This way there is really hardly any moisture from the inside getting to the wood. For the height I made it so that the foil is higher than the desired filling height with earth. I attached the foil to the wood with a staple gun.

Now the raised bed is ready and can be filled. As far as the filling material is concerned, there are different approaches. Basically, starting from the bottom, first coarse material such as branches is put in, then cuttings, raw compost and in the upper approx. 30 cm finer material such as ripe compost and humus is added. If you start with coarse material at the bottom, you have to take into account that the whole bed will sink a little over time due to the cavities that have formed and then later you will have to refill material.
Filling up with material that has not yet decayed ensures that additional nutrients are also released during the first few years due to the rotting process. Later on, however, it is necessary to add fertiliser/compost, especially if vegetables are planted in it.
Closure
The construction of the beds is basically very simple. The main difficulty was to bring the long boards (wooden rind) to the desired format. But this has surely also to do with the my still limited experience. In addition, it would certainly have been easier with a jigsaw or crosscut saw than with a table saw. But there I lacked the appropriate equipment, so I had to improvise. Anyway, the raised beds are still standing after one year and I am still very happy with the result.
Material list per raised bed
- 6x boards for the outer walls long edge, 120 cm x 20 cm
- 6x boards for outside walls short edge, 75cm x 20 cm
- 4x posts, 75 cm high, 5 cm thick
- Small material (screws & staples)
- Roof battens (optional)
- Nubbed foil (optional)
Material cost
The material costs are very low due to the by-product used (wood rind). The most expensive was the burl foil, which can be omitted as mentioned above. Approximately CHF 140 had to be spent on both raised beds.
- Wood approx. CHF 40
- Burl foil approx. CHF 60
- Curbstones for foundation approx. CHF 40
In addition, the filling material is added, if unavailable in the garden. Besides material from the garden, I picked up some bags of compost at the fermentation plant in Schlieren for about CHF 20.
View all pictures of raised bed construction
")
")
")